
If you’re new to fly tying and don’t know where to start, this guide is for you. We’ll introduce you to a handful of beginner-friendly flies that are simple to tie and effective for catching trout. You’ll also get tips on the basic tools and materials you’ll need, plus practical advice to help you build your skills over time. Fly tying is a skill that makes trout fishing more personal and rewarding—and there’s nothing quite like catching fish on a fly you tied yourself.
Getting Started with Fly Tying
Getting into fly tying can feel like stepping into a whole new side of trout fishing. It’s hands-on, creative, and surprisingly relaxing once you get the hang of it. One of the best ways to build your skills is by starting with a few tried-and-true fly patterns that are simple to tie and proven to catch trout.
In this guide, we’ll introduce you to some of the best beginner flies—patterns that don’t require advanced techniques but still get results on the water. You’ll also find helpful advice on the basic tools and materials you’ll want to have nearby as you get started.
Fly tying can give you a deeper connection to the sport. It’s a rewarding way to learn more about trout behavior and the insects they eat. And there’s nothing quite like the feeling of catching a fish on a fly you tied yourself!

Essential Tools for Fly Tying
Having the right tools can make fly tying much easier—and a lot more enjoyable. When you’re just getting started, a few key items will set you up for success and help you avoid common frustrations.
Here are the basic tools every beginner should have:
- Vise – This holds the hook steady while you tie, giving you control and precision. It’s one of the most important investments you’ll make.
- Tying lamp – Good lighting makes a big difference. A bright, adjustable lamp helps you see the small details clearly and prevents eye strain.
- Scissors – A sharp, fine-point pair of scissors is essential for cutting materials cleanly. Something around five inches, like Loon Outdoors Razor Scissors, works well for most tying tasks.
- Bobbin holder – This keeps your thread under tension and makes it easier to wrap materials smoothly. Choose a bobbin that feels comfortable in your hand and holds thread securely.
Starting with quality tools means less frustration and cleaner results—even as you’re still learning. With these basics in place, you’ll be ready to start tying patterns that actually catch fish, not just collect dust on your bench.
Basic Materials for Fly Tying
Just like having the right tools, using the right materials is key to tying effective flies. As a beginner, you don’t need everything at once—but it helps to understand the basics and build your collection over time.
Here are a few things to keep in mind when selecting materials:
- Know your target species – For trout, you’ll mostly be using smaller hooks and natural-looking materials that imitate insects like mayflies, caddis, and stoneflies.
- Match the fly to the water – Materials that work well in clear mountain streams may not be ideal in murky or fast-moving water. Local fly shops are great sources for region-specific advice.
- Stay organized – Sorting your materials by type—like feathers, dubbing, thread, and hooks—can save time and keep your tying space manageable.
- Prep materials ahead of time – Trimming, measuring, or separating fibers before you start tying makes the whole process smoother and more consistent.
The more you experiment with different materials and patterns, the better you’ll understand what works best in your local waters. With a little practice and a small stash of well-chosen supplies, you’ll be ready to tie flies that look great—and actually catch fish.

Top Beginner Fly Patterns
Focus on pretty simple, effective fly patterns that are easy to tie and proven to catch fish. Regularly practicing the same patterns refines your skills and yields better results. Tying multiple flies of the same pattern at once builds confidence and mastery, enhancing skill, speed, and productivity.
Top beginner fly patterns include the Woolly Bugger, Pheasant Tail Nymph, and Hare’s Ear Nymph. These staples are effective in various fishing conditions. Here’s how to tie each of these patterns:
Woolly Bugger
The Woolly Bugger is a classic beginner pattern that’s simple to tie and surprisingly effective. It has a flowing marabou tail, a thick, buggy body, and soft hackle that gives it lifelike movement in the water. Depending on how you fish it, it can imitate a leech, baitfish, large nymph, or even a drowning terrestrial.
How to tie it:
- Start by securing the hook in your vise and attaching your thread near the bend.
- Tie in a marabou tail about the length of the hook shank.
- Attach a piece of chenille and wrap it forward to form a thick body.
- Tie in and wrap a soft hackle feather near the head for movement.
- Whip finish and secure with head cement if you’d like.
*Whip finish: a technique used to tie off and secure your thread at the end of the fly, creating a neat knot that keeps everything in place.
This fly is great for learning foundational skills like tying tails, wrapping bodies, and handling hackle. It’s also incredibly forgiving—if your proportions are a little off, it will likely still fish well. Whether you’re drifting it in a stream or stripping it through a lake, the Woolly Bugger is a reliable trout-catching pattern every new tyer should master.
Pheasant Tail Nymph
The Pheasant Tail Nymph is a staple in trout fishing. It’s a slim, natural-looking fly that mimics a variety of mayfly nymphs and other small aquatic insects. Its realistic profile and movement make it a reliable choice in almost any trout stream, especially when fish are feeding below the surface.
How to tie it:
- Start by wrapping lead wire around the hook shank to add weight (optional but helpful for getting the fly down).
- Secure your thread behind the eye and wrap it back to the bend.
- Tie in a small bunch of pheasant tail fibers for the tail.
- Use more pheasant tail fibers (or the same bunch) to form the body, wrapping them forward in smooth, even turns.
- Add a small thorax if desired, then whip finish and cement the head.
This pattern teaches you how to tie a slimmer, more natural-looking fly and gives you practice with delicate materials like pheasant tail fibers. It’s especially useful for learning to control proportions. The finished fly may be small and simple, but it’s a workhorse on the water—especially during mayfly hatches or when trout are holding low and feeding subtly.
Hare’s Ear Nymph
The Hare’s Ear Nymph looks like many of the small insects trout eat underwater, like mayflies and caddisflies. Its fuzzy body and soft hackle give it a lifelike appearance and movement, making it a solid choice in lots of different fishing spots.
How to tie it:
- Choose a hook size appropriate for the water and fish you’re targeting.
- Secure your thread near the hook eye and wrap it back toward the bend.
- Apply hare’s ear dubbing to the thread and wrap it forward to create a fuzzy, tapered body.
- Add variations in materials or colors to match local insect hatches or improve realism.
- Tie in soft hackle feathers on each side of the hook near the front for movement.
The Hare’s Ear Nymph is a great pattern for beginners because it helps you practice dubbing and tying soft hackles. It’s effective in streams, rivers, and lakes, making it a reliable choice to have in your fly box for many different fishing conditions.

Tips for Tying Better Flies
Getting better at fly tying takes more than just practice—it’s about paying attention to the little details that can make a big difference on the water. Even simple adjustments in technique or materials can help your flies look more natural, last longer, and catch more trout. Whether you’re just starting out or looking to improve your skills, focusing on these practical tips will help you tie flies that perform better and boost your confidence at the vise.
- Keep your thread tension steady. Too loose and your materials can slip; too tight and you might break the thread. Find a balance to keep everything secure without damaging fibers.
- Apply head cement carefully. Use just a small drop and let it dry naturally. Avoid slapping it on too thick or drying it with heat right away, which can cause brittleness or cloudiness.
- Place eyes and other features thoughtfully. Position them where they’ll add realism without throwing off the fly’s balance or profile.
- Choose colors based on local insects and water conditions. Bright colors can work well in murky water, while natural shades often fool trout in clear streams.
- Trim materials carefully. Avoid uneven edges or overly bulky parts—neatness helps flies move naturally in the water.
- Prepare and organize your materials. Having fibers sorted by length and color saves time and keeps you focused.
- Tie multiple flies of the same pattern. This builds muscle memory and lets you spot small improvements with each one.
- Use quality tools and materials. Sharp scissors, good thread, and fresh feathers or dubbing make a big difference in your finished fly.
By focusing on these details and taking your time, your flies will not only look better but also perform better—helping you catch more trout on every trip.
Where to Find Fly Tying Materials
You don’t need to hunt far and wide to find quality fly tying materials. Many local fly shops offer a good selection of hooks, feathers, threads, and dubbing—plus, knowledgeable staff who can help you pick what’s right for trout fishing in your area.
If you have a Bass Pro Shops or Cabela’s nearby, they often carry fly tying supplies too, making it easy to find what you need all in one place. Online retailers specializing in fly tying gear are also great options, often with detailed descriptions and reviews to guide your choices.
For basics and some creative extras, craft stores like Hobby Lobby or Michael’s can be surprisingly handy for materials like feathers, beads, and threads.
Starting with a beginner’s kit or just a few essential items can help keep things simple as you get started. Having a variety of materials lets you try different patterns and find what works best for your local streams.

Exploring More Advanced Patterns
Once you’ve got the hang of beginner flies like the Woolly Bugger, Pheasant Tail Nymph, and Hare’s Ear Nymph, it’s fun to try some more advanced patterns. These flies use different hooks, more materials, and new tying techniques to copy a wider variety of insects and underwater creatures.
Learning new patterns not only helps you get better at tying but also gives you more options to match what fish are eating in different places and times of year. Here are two important types of flies to explore as you improve:
Dry Flies
Dry flies float on the water’s surface, imitating natural insects like mayflies, caddisflies, and midges. Because trout and other fish often feed on bugs drifting on top, dry flies can be very effective—especially during insect hatches. When tying and using dry flies:
- Use materials like deer hair, foam, or hackle to give the fly buoyancy and help it float
- Choose hook sizes that match the natural insects you’re imitating, usually ranging from size 12 to 18
- Pay attention to the fly’s shape and size to match the local insects closely
- They work best for surface-feeding fish, making them a go-to choice for many anglers
- Dry flies are popular because they offer a real challenge and a chance to see your fly in action
Tying dry flies can be a little more challenging than tying nymphs or streamers since they need to float well and look realistic. But with some practice, you’ll get the hang of it and enjoy the thrill of watching a trout rise to take your fly right off the water. Did you enjoy this post? You’ll probably like this one too: When to Use a Dry Fly vs a Wet Fly & Key Differences
Streamers
Streamers are larger flies designed to imitate baitfish, leeches, crayfish, and other underwater creatures that predatory fish like trout and bass hunt. They rely on lifelike movement to attract strikes, making them great for targeting bigger, more aggressive fish. When tying and using streamers:
- Use materials like marabou feathers, rabbit fur, or synthetic fibers to create a flowing, natural movement in the water
- Choose colors that match the local baitfish or aquatic life, such as olive, brown, black, or flashy patterns for stained water
- Tie on longer hooks (sizes 4–10) to better imitate larger prey
- Fish streamers by stripping the line with short, quick pulls to mimic fleeing baitfish or slow, steady retrieves for more subtle movement
- Add weight like lead wire or beads to help the fly sink and get into the strike zone faster
Streamers are a powerful tool for fishing in deeper pools, faster currents, or low-light conditions when predatory fish are actively hunting. Mastering streamer tying and fishing opens up new ways to catch bigger fish and keeps your fly box versatile.
Bringing It All Together
Fly tying is more than just a skill—it’s a way to connect with the water, the fish, and the outdoors. It takes patience and practice, but every step you take builds your confidence and deepens your enjoyment of the sport. Starting with good materials, simple patterns like the Woolly Bugger, Pheasant Tail Nymph, and Hare’s Ear Nymph, and keeping your workspace organized will help you get comfortable and consistent.
As you grow, trying more advanced flies like dry flies and streamers keeps things interesting and helps you adapt to different fishing situations. The small details—matching local insects, paying attention to thread tension, and organizing your tools—make a big difference in how well your flies perform.
The best part? With each fly you tie and each time you cast, you’re learning something new. Keep practicing, stay curious, and enjoy every moment on the water.
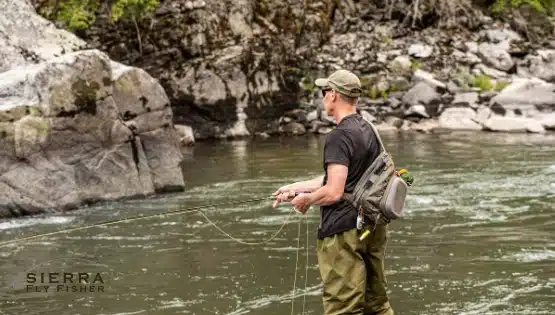
Take Your Skills Further with Sierra Fly Fisher
When you’re ready to put your fly tying and fishing skills into action, we’re here to help you take the next step. At Sierra Fly Fisher, based in Northern California, we provide guided trips to some of the region’s most peaceful and productive waters.
Our expert guides customize every trip to fit your experience level—whether you’re just starting out or aiming to refine your technique. These trips aren’t just about catching fish; they’re about building your confidence, deepening your understanding, and making every moment on the water count.
Join us for a hands-on experience where you’ll learn insider tips, practice new skills, and enjoy the beauty of Northern California’s streams and rivers. Let us help you make your next fishing adventure your best yet.

Frequently Asked Questions
What are the essential tools needed for fly tying?
You’ll want to grab a vise, tying lamp, scissors, and a bobbin holder to get started with fly tying. These tools will help you gain the control, precision, and light you need to create great flies!
What are some good beginner fly patterns to start with?
For beginners, the Woolly Bugger, Pheasant Tail Nymph, and Hare’s Ear Nymph are fantastic choices. They’re easy to tie and work well in many fishing situations, making them perfect to start with!
Why is consistent thread pressure important in fly tying?
Consistent thread pressure is key to making flies that are both durable and uniform; otherwise, you risk them unraveling or losing their shape. Keep that tension steady for the best results!
What is the whip finish technique?
The whip finish is a handy knot that secures the tying thread at the end of a fly, locking everything in place with a few wraps around the hook. It’s crucial for ensuring your fly stays intact during use!
How can guided fishing trips with Sierra Fly Fisher benefit me?
Guided fishing trips with Sierra Fly Fisher can really elevate your fly fishing game by offering personalized instruction and access to some of the best fishing spots. You’ll not only improve your skills but also enjoy a fantastic experience with knowledgeable guides.